Hi Everyone!
Here we are for the final post where I will share various ways that you can use your completed play mat!
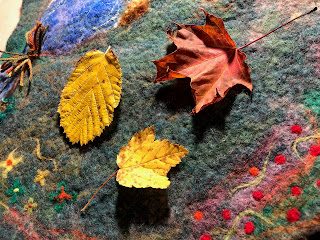
Being as this one was a forest play mat you might like to think of ways that you can incorporate real nature pieces onto it such as leaves, pine cones, chestnuts, and wood or anything that you can forage.
Looking closely at leaves can lead to discussions on color, shape, species, and parts such as veins and stems. Maybe the children would then like to use leaves on the art table to trace, rub, paint, draw or color.
You could hid an insect under neath and talk about how they are looking for a warm place to spend the winter. This could lead into a greater discussion on hibernation. Maybe you would like to add some white wool or cotton batten for the children to add as the snow comes.
Play a memory game. Place 2-4 insects under the leaf, ask the children to close their eyes and remove one. Can they figure out which one is missing?
Add in a set of forest story stones.
Study and learn about pond/stream habitat. Who lives there? Add a bridge and a troll and tell the story of the billy goats gruff.
Add in some peg dolls and tell a make up story of some of their adventures in the forest. Could that piece of drift wood be a boat and add some excitement to their outing?
Add in forest animals such as bear, fox, deer, raccoons, skunks, moose, elk etc.
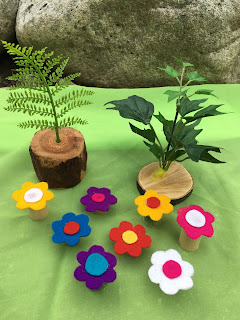
Add in real or hand made flowers and other foliage like bracken or dried grasses and offer those in various places in your home or daycare room.
Add in tree cookies.
Provide fences, take away the woodland animals and add farm animals.
Is winter coming on near you? Add in snowy mountain blocks. Or add a back drop that could be as simple as fabric or a fall/winter scene from a calendar. A mirror is also stunning as a backdrop and really adds depth and reflection to the small world play scene.
Go for a walk through the forest or if you don't live near one plan to go to a park and especially look for chestnut trees or acorns and leaves and cones to bring back.
You can plan specific story telling times like a gathering/circle time and incorporate the same animals or characters from the story. You can make up a story. Once upon a time their was a beautiful forest and in the forest lived a.......and so on.
Observe how the children play and what they are interested in and extend their play by providing props and other items that can keep the play going strong. Let them lead! They know what they want and need to learn about. They will likely inspire you with their own fabulous ideas!
Depending on the age of the children they can have full use of a small world like this, however keep in mind that young learners might still be mouthing toys so provide bigger materials for them. Your play mat could be used on a nature table for display/observation purposes. Add in all those lovely nature pieces and hang a branch above for some birds to hang on or maybe you make a nest!
I hope that you have found this tutorial on creating and using your play mat helpful. Please message me if you have any questions! I love facilitating workshops where we could make a play mat together and even some accessories! As well I sell lots of the items above at market tables or you can contact me about that as well. I am working on setting up my own online shop but have some items in my Etsy shop.
Have a happy week-end!


No comments